After about 60 years of service in the Alps, it 's time for this Libéria to be totally renewed. I have made up my mind about how to restore my newly bought randonneur. I plan to rebuilt it almost completely, yet respecting the original setup.
There is no hurry for this project, for I already have a great randonneur satisfying almost all my needs. Although I hope to do even a little better on this one than I did on the previous one.
Time to start on the front wheel.
 |
| As you can see, the chrome on the rim has vanished completely. Although the rim is still true, I want to replace it by an aluminum one. It saves weight, and the brakes will perform better on alloy. |
|
 |
| Let 's just cut the crap. The spokes wil be replaced by stainless ones. |
 |
| Here 's a hub with 60 years of dirt on it. I 'm sure it has never been cleaned in its whole life. |
 |
| Metal polish can work miracles! |
 |
| After above before. |
 |
| Half of the work done. It 's a high flange Normandy hub. I think it 's a really nice one. |
 |
| The bearings have had their best time. Actually they are that much worn, that I will not be able to reuse the hubs. Pity... |
 |
| Destination: dustbin! |
 |
| A bit of cleaning reveals the true beauty of these brakes. I thought they were made of iron, but it seems they 're aluminum. My luck! |
 |
| Okay, it looks like a mess, but it 's all there, mostly in reusable condition! |

The naked frame. It will soon make its way to the sander, and after that to the painters.
|
|
 |
| Happy couple. |
 |
| At the time I bought the bike, I didn 't know the mudguards were Lefol La Martelé. I do now, and I 'm very pleased with these. |
 |
| The original colour revealed from underneath the fork crown. |
 |
| Original colour fork bone. |
 |
| I sprayed a little piece with a can containing Raleigh green paint. Do you like it?? |
 |
| You just wait until it 's cleaned... |
 |
| The two colours next to each other. |
 |
| This is the color I have in mind for the Libéria. It 's somewhere between green and greyish. What do you think about that?? Feel free to give remarks at the bottom of the page! |
 |
| Head badge before cleanup. |
 |
| Rear derailer to be installed: it 's Sachs Huret Classic 2000. I 've never seen a derailer as tough as this. |
 |
| Long cage, big enough to cut a tree, or to outlive a world war. |
 |
| I 've got only one word for this one: Waaw! |
 |
| I know what you 're thinking now: hmm, it 's not the lightest derailer ever built... Fortunately I 'm no weight weenie. |
 |
| Brandnew high flange Normandy hubs. A little polish and a bit of new grease on the bearings, and it 's go! |
 |
| Eventually, I 'm going for down tube shifters. It 's easier than mounting bar end shifters, and it has a more classic look to it. |
 |
| Shimano 600 front derailer. A beautiful match with the rear derailer. No plastic. God no, I don 't want any plastic on this one! |
 |
| The frame after it has been sandblasted. |
 |
| Don 't know what the number means, but it doesn 't matter much to me. |
 |
| Frame sandblasted and fork sanded by hand. In the end they should look the same. |
 |
| One hour 's work. Many hours to come. |
 |
| Radios rear light. The one rear light I always wanted on my randonneur! It reminds me of a TV-series in the 80 's Battlestar Galactica. On top of that, it was a gift from my mate Philippe! Thanks pal! |
 |
| See the resemblance? |
 |
| Brrr, how cold, a naked frame. I spent more than 10 hours sanding by hand. My fingers still hurt! But I quite like the result. |
 |
| Nice lugwork. |
 |
| Exces brass removed. This sort of cleanup is never done on a mass-produced frame. |
Meanwhile, the first shipment of VO parts came in:
 |
| Grand Cru Rando handlebars |
 |
| Front Rack Campeur. Heavy duty. |
 |
| And matching rear Campeur rack. Bomb proof. |
Today the next batch of stuff arrived: it was only a small box, but it contained some fine (the finest?) tires. The Grand Bois Hêtre in cream!
If God would ride a bike, he would come down to Japan, and buy (get?) himself a pair of these!!
They don 't look as white as on some of the pictures I 've seen on the net, but I prefer these more, as they look even more vintage.

 |
| Slowlybut surely the new stuff is coming in. Here are the newly built wheels with 650B VO Diagonale rims. |
 |
| A few small things: cotton rim tape (not easy to find in regular stores) and chromed cable covers. |
Now it 's time to finally reveal the special treatment on the frame: I applied gun blue on the bare metal: it has a different appearance depending on the angle you look at it.
.JPG) |
| This is a first attempt to see how the gun blue reacts. The cloudy effect is easily removed by applying steel wool. After a few attempts I got the hang of it. |
 |
| Difference between the treated and the non-treated metal. |
 |
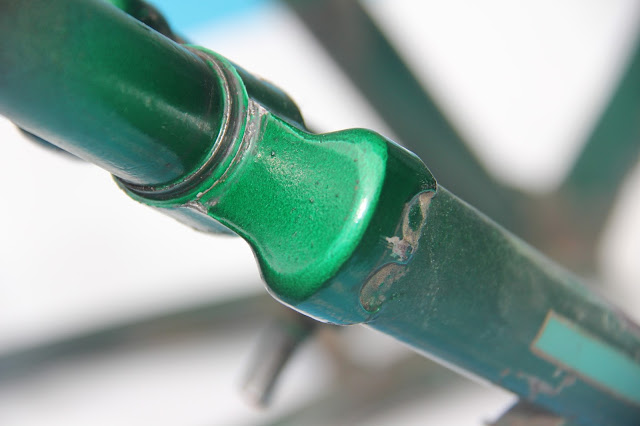
| Detail of a brake boss. |
 |
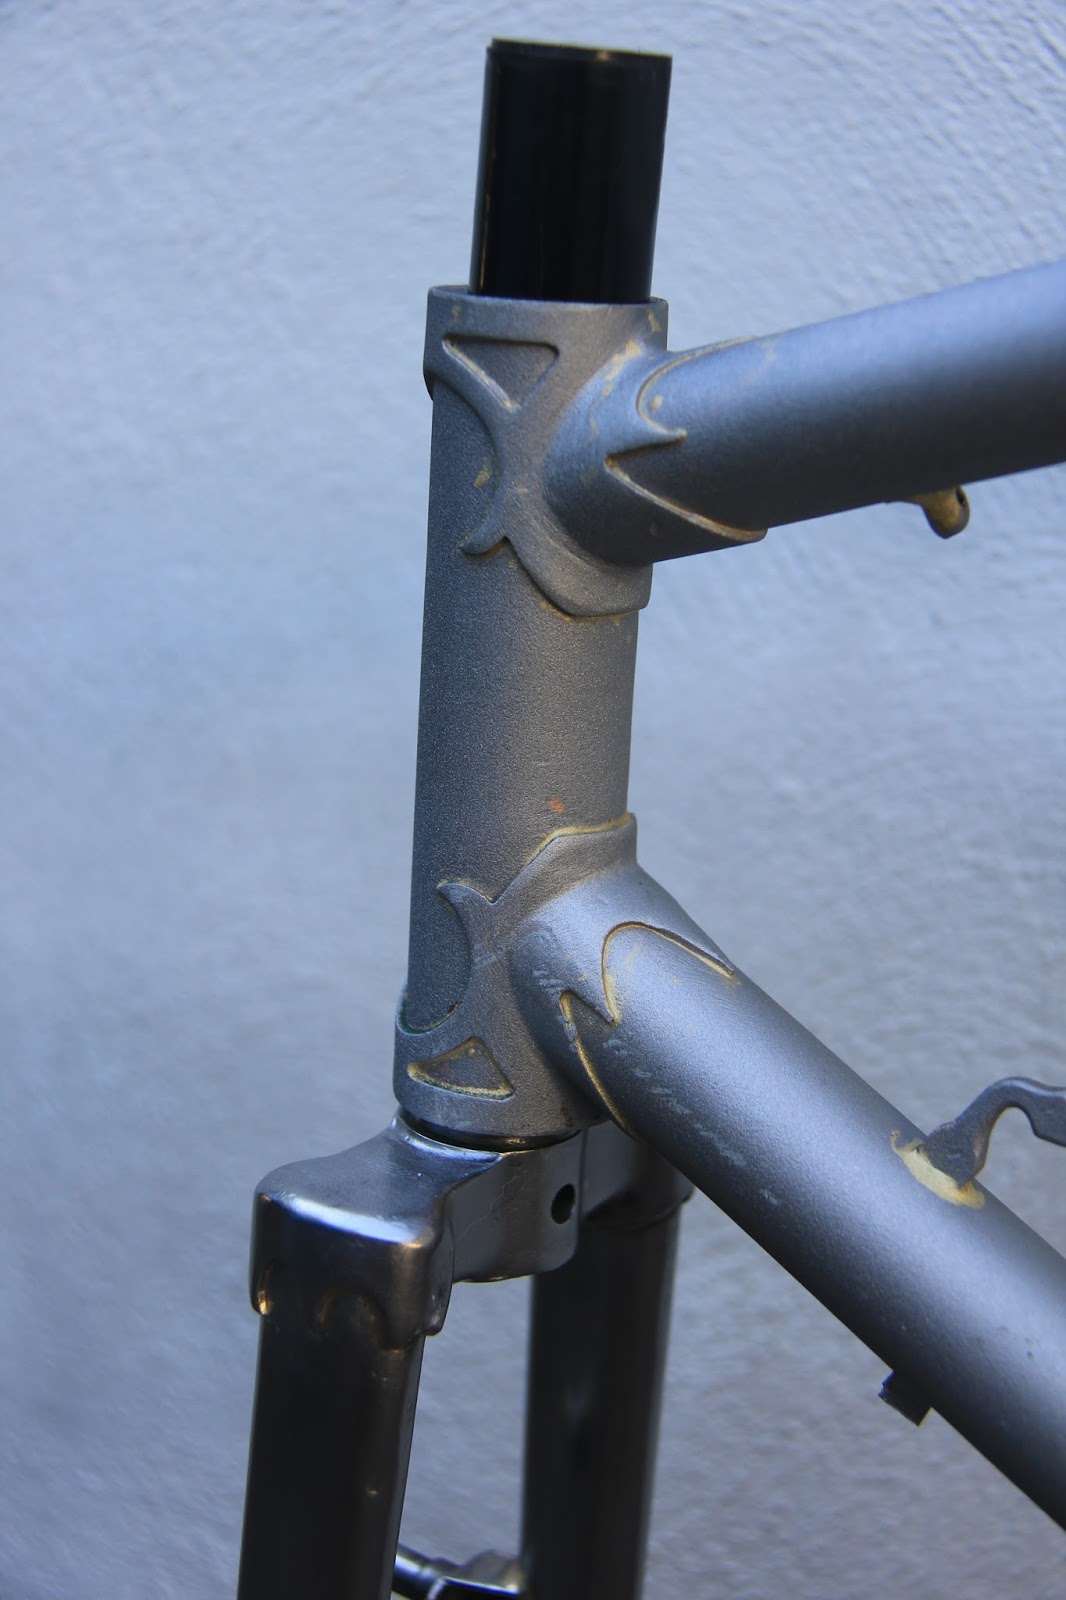
| Gunblued headtube. Reminds me of how a middle-aged armor looks. |
 |
| After returning from the painters. |
 |
| It looks clearer under bright light. |
 |
| Half the work done. But I 'm waiting for the bottom bracket to be delivered from the US. French thread made in America... it 's a strange world. |
 |
| Rear mudguard mounted. |
 |
| All rebuilt but the drive line. |
 |
| Headbadge completely restored. |
 |
| From this moment on, my randonneur again has a name! |
 |
| Campagnolo bottom bracket. Serves very well on my other randonneur. Never chance a winning part! |
 |
| TA Pro 5 Vis crankset. Also featured on the other randonneur. Never chance a winning part! |
 |
| Longer wingnut to avoid interference with the rear derailer. |
 |
| Naked handlebar with diacompe nobs mounted. |
 |
| In the meantime I managed to find a set of unused TA chainrings, even two drilled ones to reduce weight. |
 |
| Brooks Swift Titanium. Most beautiful saddle in the world. |
 |
| Rear light mounted. The rear rack serves as protection. |
 |
| There you have it. Finished! And it 's no cat in a bag... |


.JPG)


Wablieft????? Leuk echt leuk!!!!
BeantwoordenVerwijderen